Image

30 Days Free Returns

Image

Free Shipping on Orders Over

€49

Get an EXTRA 20% Off Philips Hue

Smart Lighting Solutions

philipshue10eu
Items shop  |  SKU: LPNIC110120540

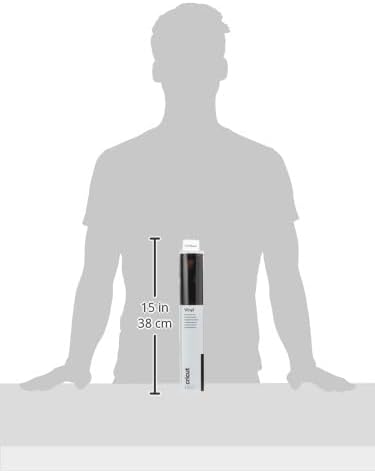
Cricut Permanent Vinyl Black 1.2 m

€8.99
Tax included Shipping calculated at checkout.

Color: Black
Size
Brand

Delivery and Shipping

Free shipping on orders over €49 in Ireland. For orders under €49 within Ireland and for orders elsewhere in the world, you will be charged the same shipping rate that we are charged.

Add a stand out message for your customers

Cricut Permanent Vinyl Black 1.2 m

blackCricut 2007711 Superior quality wine — permanentunique size

Description

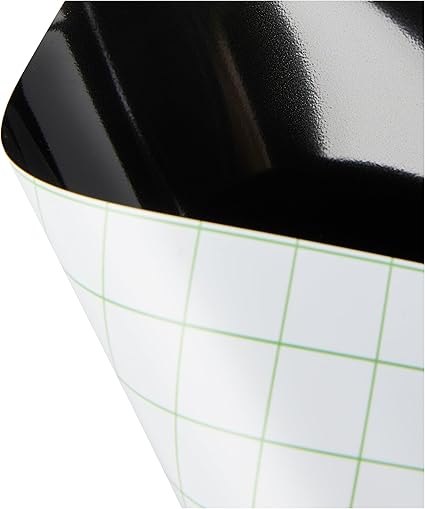
Go ahead, take it outside! Every project goes smoothly when you use Cricut Permanent Vinyl. This amazing vinyl lies flat on your cutting mat – no tunneling or bubbling. Cut your design, weed with ease, and apply with awe. Even your most intricate designs effortlessly separate from the carrier sheet for a perfect application every time. Cricut Permanent Vinyl is water-resistant & UV-resistant, and lasts up to three years - even in the great outdoors! How to cut Cricut Permanent Vinyl with your Cricut Machine: 1. Place vinyl (liner side down) on to your Cricut StandardGrip cutting mat. 2. Select this material setting in Cricut Design Space: "Premium Vinyl - Permanent". 3. Cut your design. Preparation with Cricut StandardGrip Transfer Tape: 1. Remove the negative pieces, leaving the liner intact (we recommend using the "Weeding Tool" found in the Cricut Tool Kit - sold separately). This process is known as weeding. 2. Remove the transfer tape liner. 3. Gently place the transfer tape (adhesive side down) over the images. To prevent bubbles, start in the centre and move out toward the edges. We recommend using the Scraper found in the Cricut Tool Kit (sold separately) to burnish (rub or polish) the tape onto the vinyl. 4. Peel away the vinyl liner at a 45-degree angle. Application: 1. Make sure your project surface is clean and dry. 2. Carefully place the transfer tape with your vinyl designs on to your surface, as you would like them to appear. 3. Now burnish the transfer tape on to the surface, starting in the centre and moving out toward the edges. 4. Peel the transfer tape away from the vinyl at a 45-degree angle. If the vinyl sticks to the transfer tape, simply burnish the vinyl on to the surface again. Then continue to peel the transfer tape away from the vinyl.

Payment & Security

Payment methods

  • American Express
  • Maestro
  • Mastercard
  • PayPal
  • Union Pay
  • Visa

Your payment information is processed securely. We do not store credit card details nor do we have access to your credit card information.

Items shop

Cricut Permanent Vinyl Black 1.2 m

€8.99
Go ahead, take it outside! Every project goes smoothly when you use Cricut Permanent Vinyl. This amazing vinyl lies flat on your cutting mat – no tunneling or bubbling. Cut your design, weed with ease, and apply with awe. Even your most intricate designs effortlessly separate from the carrier sheet for a perfect application every time. Cricut Permanent Vinyl is water-resistant & UV-resistant, and lasts up to three years - even in the great outdoors! How to cut Cricut Permanent Vinyl with your Cricut Machine: 1. Place vinyl (liner side down) on to your Cricut StandardGrip cutting mat. 2. Select this material setting in Cricut Design Space: "Premium Vinyl - Permanent". 3. Cut your design. Preparation with Cricut StandardGrip Transfer Tape: 1. Remove the negative pieces, leaving the liner intact (we recommend using the "Weeding Tool" found in the Cricut Tool Kit - sold separately). This process is known as weeding. 2. Remove the transfer tape liner. 3. Gently place the transfer tape (adhesive side down) over the images. To prevent bubbles, start in the centre and move out toward the edges. We recommend using the Scraper found in the Cricut Tool Kit (sold separately) to burnish (rub or polish) the tape onto the vinyl. 4. Peel away the vinyl liner at a 45-degree angle. Application: 1. Make sure your project surface is clean and dry. 2. Carefully place the transfer tape with your vinyl designs on to your surface, as you would like them to appear. 3. Now burnish the transfer tape on to the surface, starting in the centre and moving out toward the edges. 4. Peel the transfer tape away from the vinyl at a 45-degree angle. If the vinyl sticks to the transfer tape, simply burnish the vinyl on to the surface again. Then continue to peel the transfer tape away from the vinyl.

Color

Size

  • 1.2 m

Brand

  • Cricut
View product